Difference between revisions of "Sachin Datt"
Sachindatt9 (Talk | contribs) |
Sachindatt9 (Talk | contribs) |
||
| (24 intermediate revisions by 2 users not shown) | |||
| Line 1: | Line 1: | ||
Hello, | Hello, | ||
| − | I | + | I am a Visiting Fellow at Homi Bhabha Centre for Science Education, Mumbai. |
| − | The questions I ask myself | + | |
| + | |||
| + | The questions I used to ask myself were: | ||
| + | |||
What can be made? | What can be made? | ||
| + | |||
How it can be made? | How it can be made? | ||
| + | |||
To which family does a created thing belong? | To which family does a created thing belong? | ||
| + | |||
Why does/should a family of things Exist? | Why does/should a family of things Exist? | ||
| − | + | But now I dont ask myself these question. The new more relevant questions that I ask are: | |
| − | + | ||
| + | What all can we do with X? | ||
| + | What should we do with X? | ||
| + | |||
| + | |||
| + | So what can we do with a web cam? | ||
| + | You might say, we can talk to our distant friends and relatives with a web cam. We can adore our own transient face on a web cam. We can spy on other people. We can shoot our profile pics.( what we "should" do with a web cam is another issue). What else can we do with a web cam? I couldn't think of more. But one artist from Bangalore did something that I could not imagine was possible to do with a web cam. | ||
| + | |||
| + | Yashas and his team from Art Science BLR lab, from Shrishti School of Design, Bangalore Transformed a webcam into a microscope!!! And what a microscope it is, more powerful than any school lab microscope and at a cost of less than 500 rupees. | ||
| + | And they also taught us how to do it. In this article I will be sharing my experience of making a microscope out of a web cam which I learnt form ART science BLR lab people. | ||
| + | So it turns out that a thing is not what it is but what we can do with it. They expanded the world of a mundane webcam. A web cam on a laptop is just an everyday mundane device. But on a micrsocope, the webcam acquires a whole new meaning. It becomes our gateway to another dimension. | ||
| + | It opens doors to a world not seen before. Of beings and creatures that have a life so different from our own. | ||
| + | |||
| + | |||
| + | |||
| + | In this entry, I am sharing my experience of making a microscope, helped by people from ART SCIENCE BLR lab from Srishti Institute of Art, Design and Technology Bangalore. There work is truly inspiring. | ||
| + | |||
| + | These are some pictures of the microscope me and my group created. | ||
| + | |||
| + | |||
| + | [[File:Microscope.jpg|750px]] | ||
| + | |||
| + | [[File:Microscope2.jpg|500px]] | ||
| + | |||
| + | |||
| + | Here are some of the images of Daphnia I shot with the microscope | ||
| + | |||
| + | |||
| + | [[File:Dephnia.jpg|500px]] | ||
| + | |||
| + | |||
| + | [[File:Dephnia leg joint perhaps.jpg|500px]] | ||
| + | |||
| + | |||
| + | |||
| + | [[File:Dephnia3.jpg|500px]] | ||
| + | |||
| + | |||
| + | '''Process of Making''' | ||
| + | |||
| + | First we were asked to dismantle a web cam, Unscrew the lens, invert it and stick it back to the circuit board. Then we tested its super magnifying power by bringing the lens close to the computer screen and checking the RGB pixels. We could see the RGB pixels distinctly. | ||
| + | |||
| + | Then we soldered 2 wires on a battery holder and an Led with a switch in between. These were the only 2 steps that were included in the instruction. Rest everything we had to make on our own. | ||
| + | |||
| + | It was great that Yashas asked us to make the whole thing from scratch with whatever material we could lay our hands onto in HBCSE campus. | ||
| + | So I went Junk hunting in my Design and Technology lab and found some toys meant for kindergarten kids. These were primitive geometrical objects like cubes, Cylinders and a dough-nut shape. | ||
| + | |||
| + | We were three people in our group. Initially some people in our group wondered why Yashas's Microscope is inverted? It has the source of light | ||
| + | above and the camera below the slide. Thats not how an "actual" microscope is like. So we decided to correct the mistake and make the arrangement the way it is in a conventional microscope, Lens up, slide, then Light source at the bottom. | ||
| + | |||
| + | |||
| + | So we assembled the whole thing to imitate a real microscope and were really excited to plug the web cam into the laptop to see micro organisms. | ||
| + | We were finding it extremely difficult to place the slide exactly below the webcam lens because the webcam was inverted and it was obstructing the way. Nor were we able the hold the slide at a stable position. Thats when we realised that putting the cam above the slide was a terrible idea. | ||
| + | |||
| + | |||
| + | So we dismantled the whole thing and started afresh. This time we also made sure that we built a mechanism to move the slide up and down to achieve perfect focus. So we put the slide holder platform on a screw with cardboard nuts that could go up and down when rotated on the screw. | ||
| + | |||
| + | So we completed this thing and prepared slide with Daphnia samples and so the insides of this microorganism. | ||
| + | |||
| + | |||
| + | |||
| + | '''How to make Daphnia Incubator''' | ||
| + | |||
| + | Daphnia are also known as water fleas because they move like them. They are usually found in fresh water lakes, ponds and rivers. | ||
| + | |||
| + | |||
| + | In this workshop we learn the procedure for Growing a family of Daphnia. | ||
| + | |||
| + | Fill half a cup with water that has been kept stagnant under the sun for more than 2 days. | ||
| + | |||
| + | |||
| + | |||
| + | [[File:Dephniaculture.jpg|500px]] | ||
| + | |||
| + | |||
| + | Pull out a few old Daphnias from an existing culture. They will probably be brownish in colour because lack of oxygen that may have been consumed by overpopulation. Soon they will turn red. Thats when they are dead. when they are muddy brown, they are still just about alive to begin a new culture in a fresh environment. | ||
| + | |||
| + | [[File:DephniaPullout.jpg|500px]] | ||
| + | |||
| + | |||
| + | Now put this old Daphnia in the fresh water cup you prepared earlier. But they will need food to eat in this new environment. | ||
| + | SO put a quarter of a drop of milk for Daphnia to feed on and produce a new colony. | ||
| + | |||
| + | |||
| + | |||
| + | [[File:Milk.jpg|500px]] | ||
| + | |||
| + | |||
| + | [[File:Milk2.jpg|500px]] | ||
| + | |||
| + | |||
| + | Leave the cup undisturbed for a day for Daphnia to peacefully multiply. Next day you will see a flourishing kingdom of white coloured Daphnia going about their daily business, ready to be picked up by droppers and observed under your new Microscope. | ||
| + | Happy peeping into the personal lives of Daphnia... | ||
| + | |||
| + | |||
| + | |||
| + | Caution: Don't put the cover slip on the slide. That will squash the geometry of a live Daphnia. | ||
| + | |||
| + | |||
| + | '''Microscope with high definition Web cam''' | ||
| + | |||
| + | [[File:High res web cam microscope.jpg||600px]] | ||
| + | |||
| + | On the request and idea of Prof. Arunan and Prof Nagarjuna from HBCSE, I fabricated a new microscope using a High definition web cam. | ||
| + | Their idea was to convert an existing dissection microscope which is generally lying waste in school laboratories and turn it into a | ||
| + | microscope that outputs display on a laptop screen. Having a large screen output is much better to incite curiosity than peeping into a keyhole of a traditional microscope. | ||
| + | |||
| + | Most of the ideas were provided by Profs. Arunan and Nagarjuna. I just implemented them. | ||
| + | I took out the existing lens from the old microscop and stuck a transparent acrylic sheet about 4 mm thick. | ||
| + | The HD web cam was Logitech web cam with 720p video resolution and 3M still image resolution; model no. C270. | ||
| + | The lense in this was really small, But I could easily unscrew it, reverse it and pasted it back. | ||
| + | But what do i see, it does not have a good magnification. For a while I thought that the idea flopped. These cameras have fixed zoom so whatever you have, you cannot do much about it. It had less zoom and that was it, I thought and could no nothing about it. Disappointment surrounded me. | ||
| + | then during lunch time in canteen Prof. Nagrjuna implanted an idea in my head that why not use lens of the previous microscope and electronics of the new Logitech webcam? I immediately tried this ingenious idea and it worked!! I placed the lens from the regular webcam and stuck it on the CMOS of the HD cam. It was wonderful to see images from this setup. More magnified and greater resolution. We saw some crazy things from this setup. | ||
| + | have a look... | ||
| + | |||
| + | [[File:HDwebcam microscope display.jpg||600px]] | ||
| + | |||
| + | |||
| + | |||
| + | |||
| + | |||
| + | |||
| + | |||
| + | |||
| + | |||
| + | |||
| + | |||
| + | '''Thank you''' | ||
Latest revision as of 11:37, 5 April 2016
Hello, I am a Visiting Fellow at Homi Bhabha Centre for Science Education, Mumbai.
The questions I used to ask myself were:
What can be made?
How it can be made?
To which family does a created thing belong?
Why does/should a family of things Exist?
But now I dont ask myself these question. The new more relevant questions that I ask are:
What all can we do with X? What should we do with X?
So what can we do with a web cam?
You might say, we can talk to our distant friends and relatives with a web cam. We can adore our own transient face on a web cam. We can spy on other people. We can shoot our profile pics.( what we "should" do with a web cam is another issue). What else can we do with a web cam? I couldn't think of more. But one artist from Bangalore did something that I could not imagine was possible to do with a web cam.
Yashas and his team from Art Science BLR lab, from Shrishti School of Design, Bangalore Transformed a webcam into a microscope!!! And what a microscope it is, more powerful than any school lab microscope and at a cost of less than 500 rupees. And they also taught us how to do it. In this article I will be sharing my experience of making a microscope out of a web cam which I learnt form ART science BLR lab people. So it turns out that a thing is not what it is but what we can do with it. They expanded the world of a mundane webcam. A web cam on a laptop is just an everyday mundane device. But on a micrsocope, the webcam acquires a whole new meaning. It becomes our gateway to another dimension. It opens doors to a world not seen before. Of beings and creatures that have a life so different from our own.
In this entry, I am sharing my experience of making a microscope, helped by people from ART SCIENCE BLR lab from Srishti Institute of Art, Design and Technology Bangalore. There work is truly inspiring.
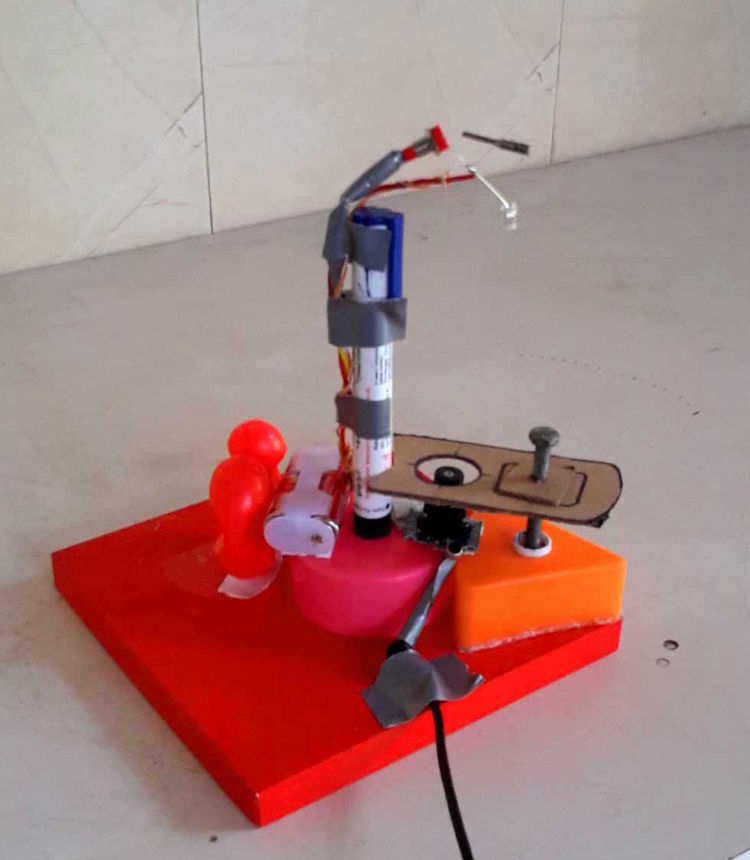
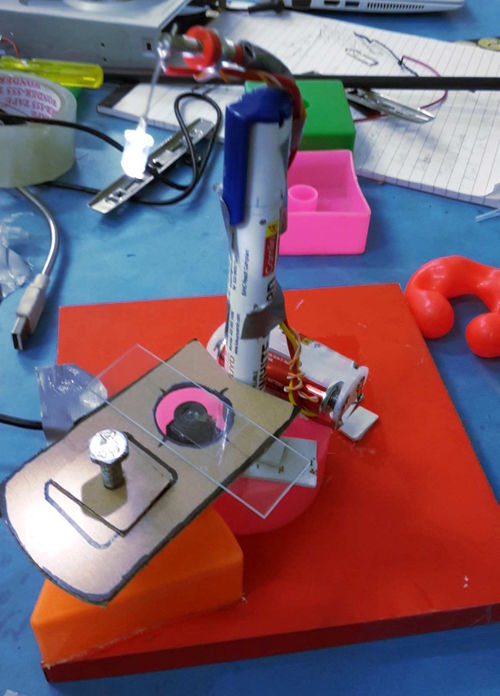
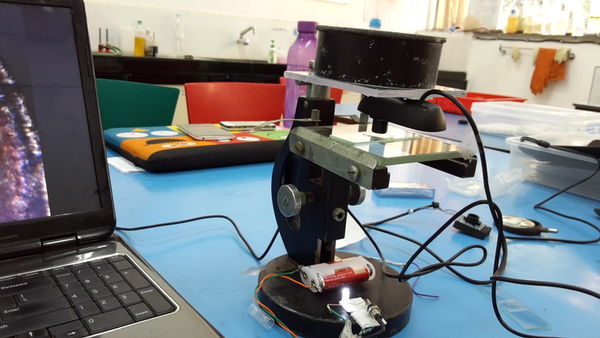
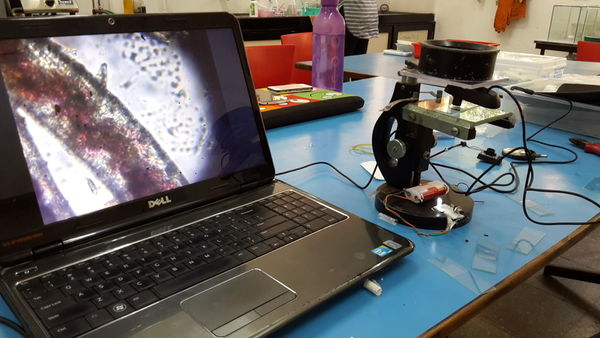
These are some pictures of the microscope me and my group created.
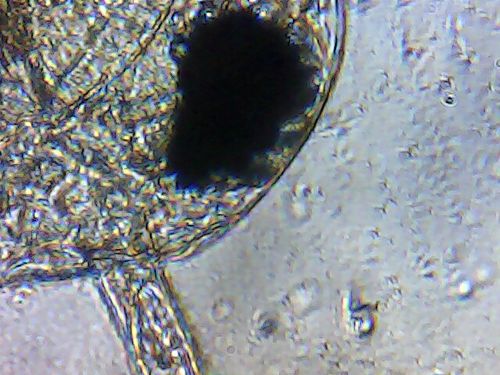
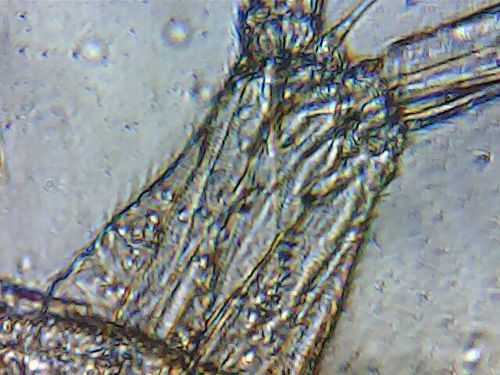
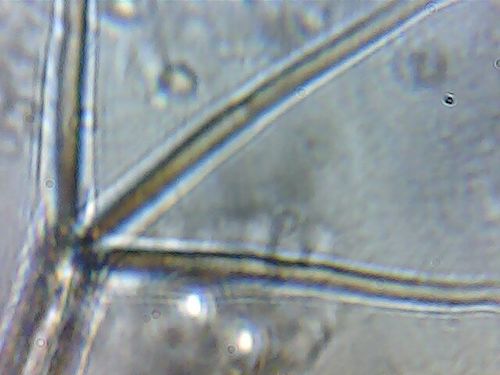
Here are some of the images of Daphnia I shot with the microscope
Process of Making
First we were asked to dismantle a web cam, Unscrew the lens, invert it and stick it back to the circuit board. Then we tested its super magnifying power by bringing the lens close to the computer screen and checking the RGB pixels. We could see the RGB pixels distinctly.
Then we soldered 2 wires on a battery holder and an Led with a switch in between. These were the only 2 steps that were included in the instruction. Rest everything we had to make on our own.
It was great that Yashas asked us to make the whole thing from scratch with whatever material we could lay our hands onto in HBCSE campus. So I went Junk hunting in my Design and Technology lab and found some toys meant for kindergarten kids. These were primitive geometrical objects like cubes, Cylinders and a dough-nut shape.
We were three people in our group. Initially some people in our group wondered why Yashas's Microscope is inverted? It has the source of light above and the camera below the slide. Thats not how an "actual" microscope is like. So we decided to correct the mistake and make the arrangement the way it is in a conventional microscope, Lens up, slide, then Light source at the bottom.
So we assembled the whole thing to imitate a real microscope and were really excited to plug the web cam into the laptop to see micro organisms.
We were finding it extremely difficult to place the slide exactly below the webcam lens because the webcam was inverted and it was obstructing the way. Nor were we able the hold the slide at a stable position. Thats when we realised that putting the cam above the slide was a terrible idea.
So we dismantled the whole thing and started afresh. This time we also made sure that we built a mechanism to move the slide up and down to achieve perfect focus. So we put the slide holder platform on a screw with cardboard nuts that could go up and down when rotated on the screw.
So we completed this thing and prepared slide with Daphnia samples and so the insides of this microorganism.
How to make Daphnia Incubator
Daphnia are also known as water fleas because they move like them. They are usually found in fresh water lakes, ponds and rivers.
In this workshop we learn the procedure for Growing a family of Daphnia.
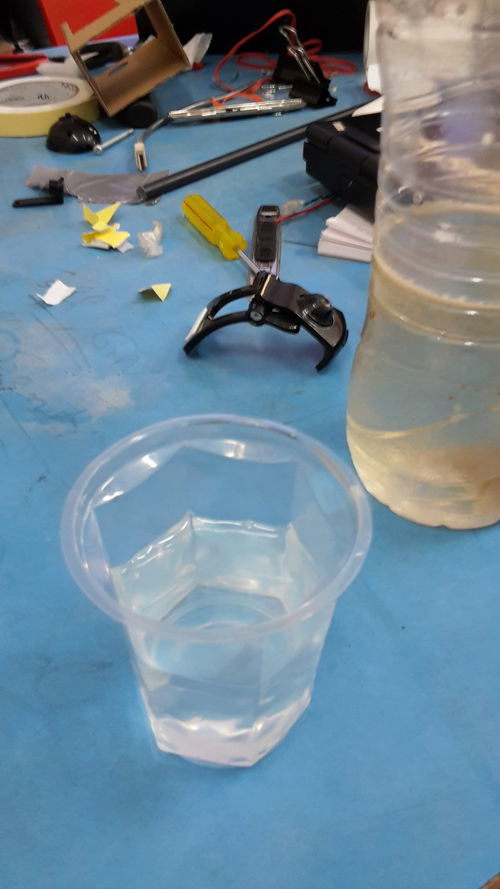
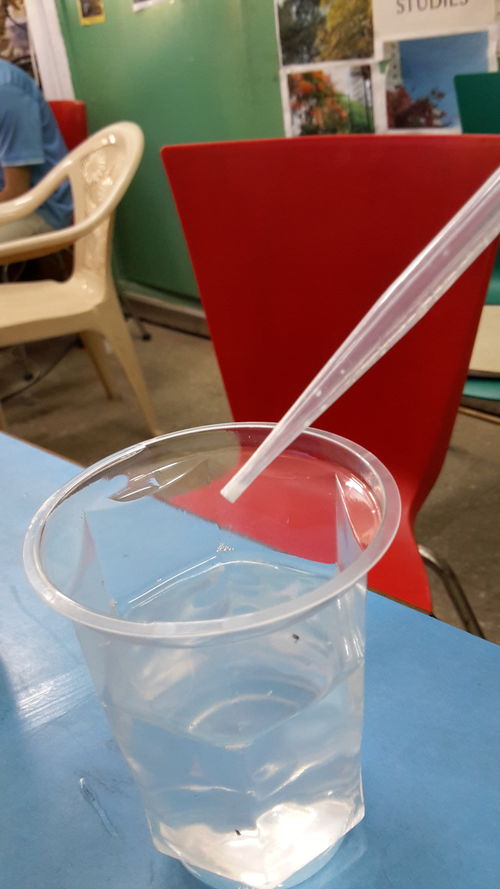
Fill half a cup with water that has been kept stagnant under the sun for more than 2 days.
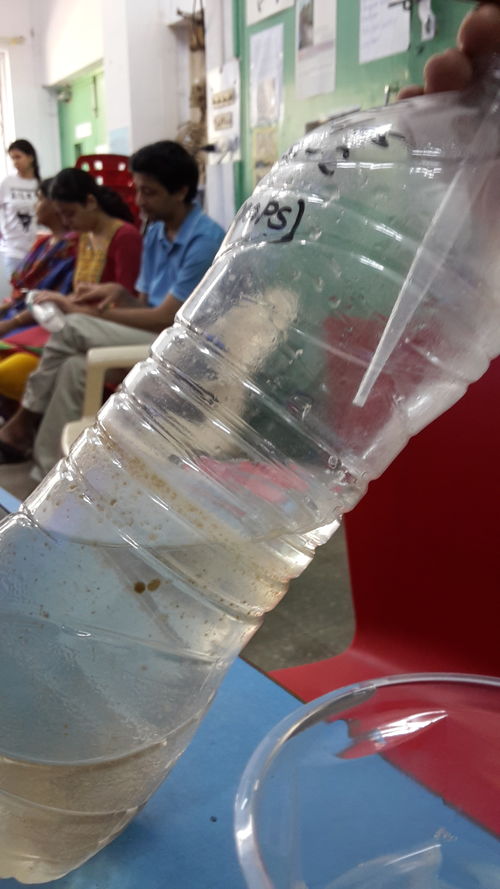
Pull out a few old Daphnias from an existing culture. They will probably be brownish in colour because lack of oxygen that may have been consumed by overpopulation. Soon they will turn red. Thats when they are dead. when they are muddy brown, they are still just about alive to begin a new culture in a fresh environment.
Now put this old Daphnia in the fresh water cup you prepared earlier. But they will need food to eat in this new environment.
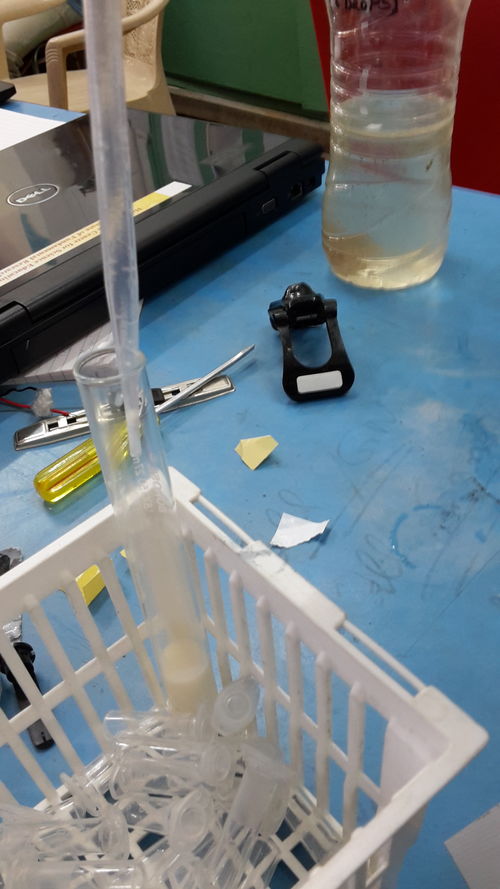
SO put a quarter of a drop of milk for Daphnia to feed on and produce a new colony.
Leave the cup undisturbed for a day for Daphnia to peacefully multiply. Next day you will see a flourishing kingdom of white coloured Daphnia going about their daily business, ready to be picked up by droppers and observed under your new Microscope.
Happy peeping into the personal lives of Daphnia...
Caution: Don't put the cover slip on the slide. That will squash the geometry of a live Daphnia.
Microscope with high definition Web cam
On the request and idea of Prof. Arunan and Prof Nagarjuna from HBCSE, I fabricated a new microscope using a High definition web cam. Their idea was to convert an existing dissection microscope which is generally lying waste in school laboratories and turn it into a microscope that outputs display on a laptop screen. Having a large screen output is much better to incite curiosity than peeping into a keyhole of a traditional microscope.
Most of the ideas were provided by Profs. Arunan and Nagarjuna. I just implemented them. I took out the existing lens from the old microscop and stuck a transparent acrylic sheet about 4 mm thick. The HD web cam was Logitech web cam with 720p video resolution and 3M still image resolution; model no. C270. The lense in this was really small, But I could easily unscrew it, reverse it and pasted it back. But what do i see, it does not have a good magnification. For a while I thought that the idea flopped. These cameras have fixed zoom so whatever you have, you cannot do much about it. It had less zoom and that was it, I thought and could no nothing about it. Disappointment surrounded me. then during lunch time in canteen Prof. Nagrjuna implanted an idea in my head that why not use lens of the previous microscope and electronics of the new Logitech webcam? I immediately tried this ingenious idea and it worked!! I placed the lens from the regular webcam and stuck it on the CMOS of the HD cam. It was wonderful to see images from this setup. More magnified and greater resolution. We saw some crazy things from this setup. have a look...
Thank you
