Difference between revisions of "Harshika"
| Line 69: | Line 69: | ||
By adding the capacitor we could light the LED even after removing the battery due to the stored charge in the capacitor. The LED would just fade into nothingness rather than going off in a blink – that’s how momentary it was. Even using large capacitance dint make much of a difference in our circuits. And to light the LED for even one minute longer will require capacitor of the size of our classroom. I theoretically understand its use, but practically still don’t understand it. | By adding the capacitor we could light the LED even after removing the battery due to the stored charge in the capacitor. The LED would just fade into nothingness rather than going off in a blink – that’s how momentary it was. Even using large capacitance dint make much of a difference in our circuits. And to light the LED for even one minute longer will require capacitor of the size of our classroom. I theoretically understand its use, but practically still don’t understand it. | ||
| + | |||
==Diode== | ==Diode== | ||
| Line 93: | Line 94: | ||
I had never used or studied about an IC chip and it seemed very complicated to me. And the connections in the schematic diagram dint seem to help my case. But as I started working on it they seemed to simplify themselves. We used a DC battery and converted direct current into alternating current to pass through the speaker. The pitch of the audio output changed as I changed the value of resistance. We also replaced the resistor with LDR and thermistor to get a totally different audio output. | I had never used or studied about an IC chip and it seemed very complicated to me. And the connections in the schematic diagram dint seem to help my case. But as I started working on it they seemed to simplify themselves. We used a DC battery and converted direct current into alternating current to pass through the speaker. The pitch of the audio output changed as I changed the value of resistance. We also replaced the resistor with LDR and thermistor to get a totally different audio output. | ||
| − | + | [[File:Amplifier.jpg|150px||right|]] | |
===Amplifier=== | ===Amplifier=== | ||
| + | |||
The circuit of the amplifier was more or less the same as the previous one. Here we had an audio input which was amplified and played out by the speaker. Due to a lot of practice on the earlier one, this seemed like a cakewalk to me. After prototyping, I started making the connections on the PCB which dint take long. But this time I had to be aware of the placement of all my components so I could get a neat final output. | The circuit of the amplifier was more or less the same as the previous one. Here we had an audio input which was amplified and played out by the speaker. Due to a lot of practice on the earlier one, this seemed like a cakewalk to me. After prototyping, I started making the connections on the PCB which dint take long. But this time I had to be aware of the placement of all my components so I could get a neat final output. | ||
Due to a low quality speaker, my speaker worked best at low input volume. | Due to a low quality speaker, my speaker worked best at low input volume. | ||
| + | |||
=Project 1: Making a Toy= | =Project 1: Making a Toy= | ||
| Line 122: | Line 125: | ||
==Knight Rider== | ==Knight Rider== | ||
| + | [[File:Knight_Rider_(2).JPG|300px||right|]] | ||
Coding for the following program: | Coding for the following program: | ||
| − | [[File:Knight_rider.jpg | + | [[File:Knight_rider.jpg]] |
==External Light Controlled LED== | ==External Light Controlled LED== | ||
| Line 134: | Line 138: | ||
=Project 2: Creating a Magic Trick= | =Project 2: Creating a Magic Trick= | ||
| + | [[File:Magic2 (1).JPG|200px||right|]] | ||
Though we had to work in pair due to lack of cooperation and coordination of my partner I worked alone on this project. | Though we had to work in pair due to lack of cooperation and coordination of my partner I worked alone on this project. | ||
| Line 141: | Line 146: | ||
Coding for the above program: | Coding for the above program: | ||
| − | [[File:Magic_1.png]] | + | [[File:Magic_1.png]][[File:Magic2_(2).JPG|200px||right|]] |
[[File:Magic_2.png]] | [[File:Magic_2.png]] | ||
Revision as of 20:20, 17 October 2015
I am a second year student at Srishti Institute of Art, Design and Technology. Electronics has always been a field of interest for me. I thought learning electronics could add a dimension to the products I design later as a product designer. I am science student so I knew the basics. But my knowledge was all theoretical as the two years were all about the theory and hence never got to practice and work on it practically. This course has given me the opportunity and the push to experiment and explore the practical side.
Contents
Micro Robots
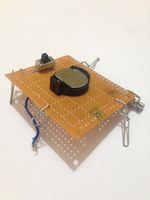
Building the robot on the first day had so much more to it. It boosted my interest in the class to another level. The circuit of making the motor run was so simple, but when the robot started to vibrate and move, it was so fascinating. We learnt how to make a basic circuitry using battery, switch and a motor. One can just entwine the wires together to make the connections between them, but that way the connections are loose and hence unstable. So we learnt how to solder – this provides the basic strength to the connections making them secure. My first connection was very untidy but by the end of the class they became very neat and accurate.
When I started to attach the robot to the circuit, I realized one leg of the vibrating motor was broken which made it difficult to make that connection. It started vibrating once I overcame that problem, but it was momentary and stopped working then. I checked all the connections to make sure, but they were all fine. After a lot of trial and error I figured out that the battery holder had short-circuited and hence wasn’t working. I changed it to make my robot vibrate again.
Working on the circuit rather than just studying about it is a far more effective way of learning.
Trip to SP Road
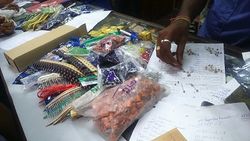
Electrical shops were situated on either side of lane, some big and some small. The place was very crowded and all the shops were busy. All the shops had so much to offer. The supplies in the shops as well as the staff were so organised.
Going ourselves and buying the materials from SP road was a very new experience. It made a lot of difference. We had to be very careful and keep a track of what the shopkeeper was giving us. It took us a while figuring everything out, but the wait was worth it. While some people left, I was one of the few who survived the wait. Even after finishing the list it wasn’t over. We had to bargain and negotiate a lot. All of this added to the experience. The trip was fun but by the end it was both physically and mentally exhausting.
Introduction to Components
Over the course of first two weeks, we explored many components in detail. Some basic, but others advanced.
Battery
An electric battery is a device consisting of two or more electrochemical cells that convert stored chemical energy into electrical energy. Each cell has a positive terminal, or cathode, and a negative terminal, or anode. The terminal marked positive is at a higher electrical potential energy than is the terminal marked negative. The electrons flow from the negative terminal to the positive terminal but conventionally the flow of current is from positive terminal to the negative
Making a Lemon Battery
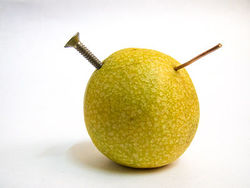
To a person who hasn't studied about batteries, the idea of lemon battery seems outrageous. But all one needs is an anode rod (zinc rod), a cathode rod (copper rod) and lemons (electrolyte). Insert the two rods in the lemon to make your cell.
But the voltage from one lemon isn't enough to light a bulb. This project wasn't very difficult as I had already done this project as a kid. My bulb produced a voltage of 1.1 Volts which wasn’t enough to glow an LED as it requires atleast of 3 Volts. One battery wasn’t enough though connecting 3-4 such lemon batteries connected in series could only light up the LED.
Switch
A switch is an electrical component that allows the user to control whether the current will flow through the circuit or not.
Making a Crazy Switch
Till today, the concept of switch in my mind was very restricted, but today I realized that the mechanism of a switch can be operated even by some sensing element such as pressure or temperature. From aluminium foil to a human body can be used as a switch.
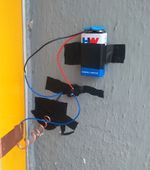
I did a group project with two of my batch mates. We brainstormed and thought many elements that could work as switch, but finally we decided to make a safety system where the buzzer would go on as soon as someone would open the door. The concept and the circuit behind it were very simple. As soon as someone opened the door, the circuit would get completed and the buzzer would go off.
Resistors
A resistor is a two-terminal electrical component that implements resistance as a circuit element. Resistors offer resistance to the flow of current. In electronic circuits, resistors are an important component. The resistors have colour code (a combination of 4 coloured bands) which help us calculate the resistance offered by that resistor. Resistors can have fixed resistance or variable resistance.Fixed resistors have resistances that only change slightly with temperature, time or operating voltage. Variable resistors can be used to adjust circuit elements (such as a volume control or a lamp dimmer), or as sensing devices for heat, light, humidity, force, or chemical activity.
Since we were just exploring and trying to understand the properties of the electrical components, we needed just a prototype and hence started working with breadboard unlike PCB where have to solder.
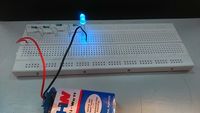
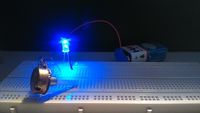
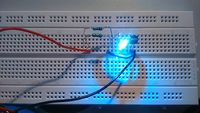
We made some basic circuits to see how they affect the brightness of the LED. Initially we used fixed resistors like 1k and 10k. But later we worked with potentiometer where we could change the value of the resistance just by turning the knob. In circuits where you are not aware of what value of resistance you require they are a good option, but when you know the accurate value of resistance required it’s better to use the fixed resistance.
We also used thermistors and LDRs, which work as resistors by sensing the environment around them. Resistance of thermistors change with the amount of heat provided to it and that of LDRs by changing the intensity of light falling on them.
Capacitor
A capacitor is a two-terminal electrical component used to store electrical energy temporarily in an electric field. As the name bipolar capacitor suggest they are a type of capacitor that has no implicit polarity – and hence can be connected either way in a circuit. While polar capacitor have an implicit polarity – and hence can be connected only in one way.
By adding the capacitor we could light the LED even after removing the battery due to the stored charge in the capacitor. The LED would just fade into nothingness rather than going off in a blink – that’s how momentary it was. Even using large capacitance dint make much of a difference in our circuits. And to light the LED for even one minute longer will require capacitor of the size of our classroom. I theoretically understand its use, but practically still don’t understand it.
Diode
A diode is a two-terminal electronic component that conducts primarily in one direction while blocking current in the opposite direction.
Transistor
I have studied transistors as a semiconductor device used to amplify electrical signals and switch electrical power. Even back in school, I used to hate transistors as I could never understand them completely in detail. Working in class with them just brought back those bitter memories. That session is like a blur in my memory.
555 Timer IC
555 timer is an integrated circuit (chip). It has 8 pins.
Using a speaker
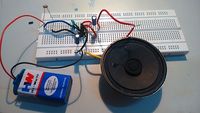
I had never used or studied about an IC chip and it seemed very complicated to me. And the connections in the schematic diagram dint seem to help my case. But as I started working on it they seemed to simplify themselves. We used a DC battery and converted direct current into alternating current to pass through the speaker. The pitch of the audio output changed as I changed the value of resistance. We also replaced the resistor with LDR and thermistor to get a totally different audio output.
Amplifier
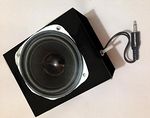
The circuit of the amplifier was more or less the same as the previous one. Here we had an audio input which was amplified and played out by the speaker. Due to a lot of practice on the earlier one, this seemed like a cakewalk to me. After prototyping, I started making the connections on the PCB which dint take long. But this time I had to be aware of the placement of all my components so I could get a neat final output. Due to a low quality speaker, my speaker worked best at low input volume.
Project 1: Making a Toy
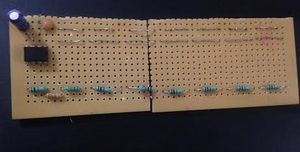
My project was an extended version of the circuit where we used a 555 IC to get an output from the speaker. In the original circuit, there is one resistance of 1k which provides the output. Here, I connected 7 such resistors of 1k in resistance connected with individual switch. Whichever switch was pressed, the current would pass through that resistor and all the previous ones. This way I got 7 notes with little variation to the previous one; but they weren’t a match to the actual notes of the piano.
The prototype of the piano worked properly on the breadboard, but when I made these connections on the PCB they dint work out the same way. I made all the connections on PCB thrice but they still weren’t working as in the prototype. I looked for the problem but couldn’t figure it out and at last just gave up on it.
Arduino Uno
Arduino is an open-source physical computing platform based on a simple i/o board and a development environment that implements the Processing/Wiring language. Arduino can be used to develop stand-alone interactive objects or can be connected to software on our computer.
In the third week, we worked with Arduino Uno. By now we were familiar with the part where we had to make the connections. What we ha to learn was to code our Arduino to make our interactive objects. The software uses C++ programming language. Due to my prior knowledge in this language, it was easy for me to code my program and a lot of fun.
Working with Arduino was a more enhanced experience of the first 2 weeks. It offered much more possibility. Also, it required more logical skills than labour skills.
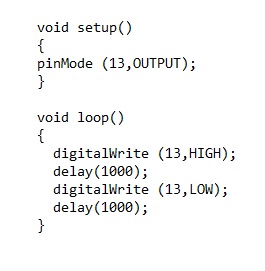
Blink an LED
Coding for the following program:
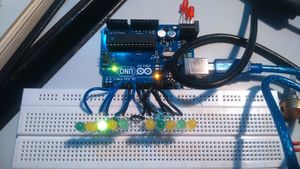
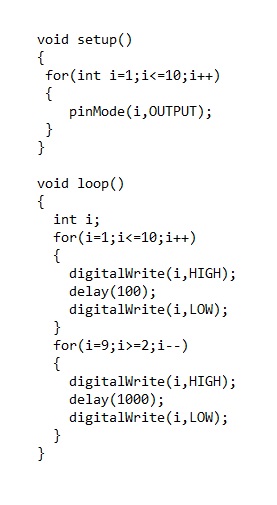
Knight Rider
Coding for the following program:
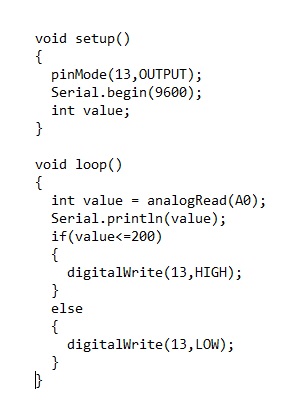
External Light Controlled LED
Coding for the following program:
Project 2: Creating a Magic Trick
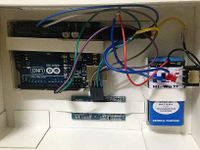
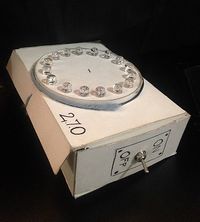
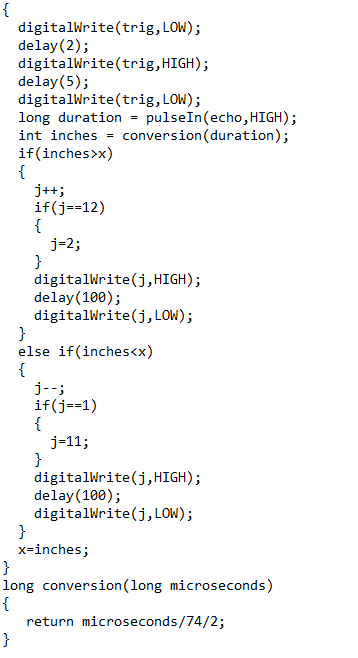
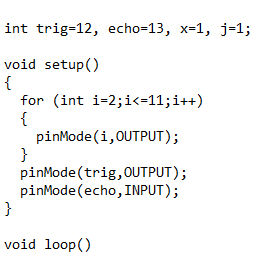
Though we had to work in pair due to lack of cooperation and coordination of my partner I worked alone on this project. I controlled the movement of light by my movement. If I moved towards the magic box, the LEDs would glow in clockwise direction, as I moved away from it the LEDs would glow in anti-clockwise direction and would stop glow as I stopped moving. I used an ultrasonic sound to measure distance and compare with the last measurement and then command the required LED to blink. The coding took 4 iterations to work properly. Still, coding was the easy part. Making all the connections precisely was a hell of a task. It was very time consuming and very exhausting. By the time I was finished, I had lost all the hope to work further in my life.
Coding for the above program:
Nano-Satellite
A miniaturized satellite is an earth-orbiting device having lower mass and smaller physical dimensions than a conventional satellite , such as a geostationary satellite. They are well-suited for use in proprietary wireless communications networks, as well as for scientific observation, data gathering and the Global Positioning System (GPS). Miniaturized satellites can be classified according to mass in kilograms(kg). A micro-satellite(or microsat) masses between 10kg and 500kg. A nano-satellite(or nanosat) masses between 1kg and 10kg. A pico-satellite(or picosat) masses less than 1kg.
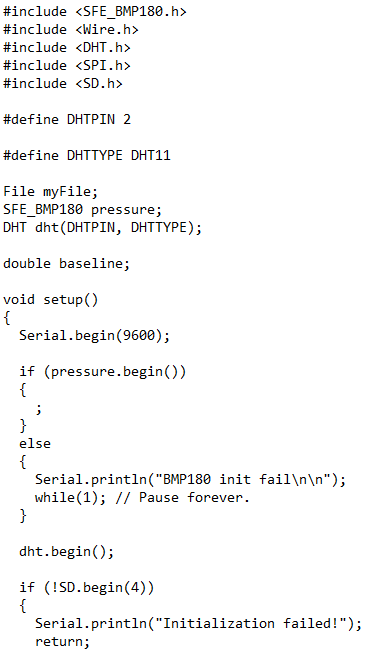
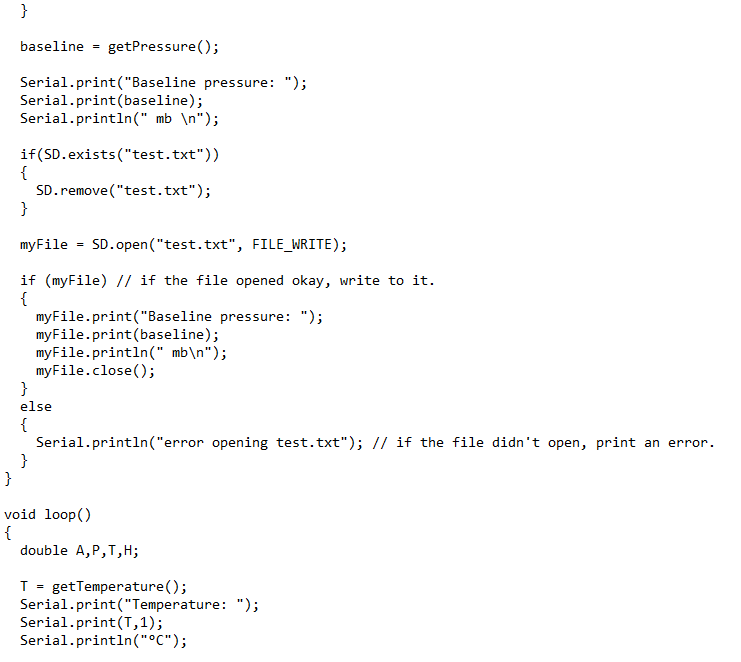
We are working on a nano satellite, which will weigh approximately 1.2kgs. We being amateurs at this, are working on a very basic model, which will be capable of clicking pictures, recording video, measuring pressure, temperature, humidity, altitude, UV radiations and CFC content. It will not orbit around earth like a satellite is supposed to, rather we will use a meteorological balloon filled with helium gas and an attached parachute to conduct our tests.The purpose of building this satellite is to demonstrate that it is possible to build a satellite for less than Rs 10,000 using commonly available parts and take pictures of curvature of earth.
